Writing for the Masses; a 40% Keyboard FAQ

ABQ

Based on analytics, the majority of visitors come to my blog looking at my mechanical keyboard posts. Even though they are many years old at this point, my UT47.2, Tofu HHKB vs Tokyo 60 and 1UP Keyboards HHKB reviews still bring the most traffic to this blog. It’s crazy, are there not enough reviews of those keyboards on the internet? Who knows. The funny thing is, I don’t get comments on those posts so I’m not sure if people find them helpful.

This means if I wanted to increase the number of viewers to my blog, I should write more about keyboards. However, my involvement in the hobby has slowly waned over the years. It’s not that I’m done with the hobby – my tastes/interests have been honed to the point where I’m only interested in 40% keyboards. Since it’s not the most popular segment of an already niche hobby, there’s not much to keep up with (which I’m thankful for – it’s been a blessing for my wallet and time).

UT47.2

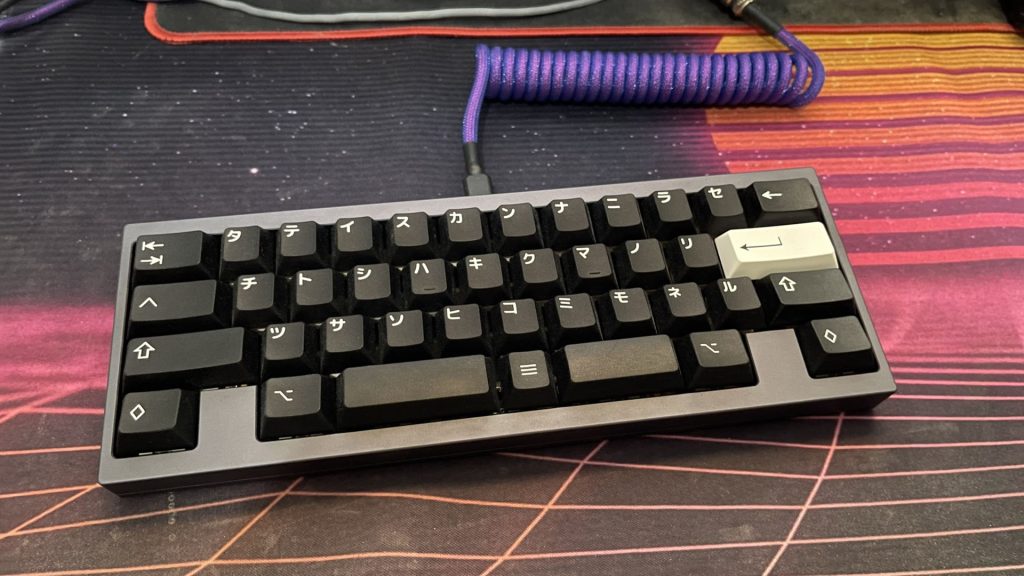
That being said, I could spend a lot of time talking about how much I love using 40% keyboards. Would it be boring or irrelevant for most readers? Probably but I would be writing about something I care about. I’m not claiming to be the authority on all things 40% but as an enthusiast for the past four years, I know enough to provide intelligent answers.

I reached out to my friends, compiled some questions about 40% keyboards and will answer them in this post.

Daisy HHKB

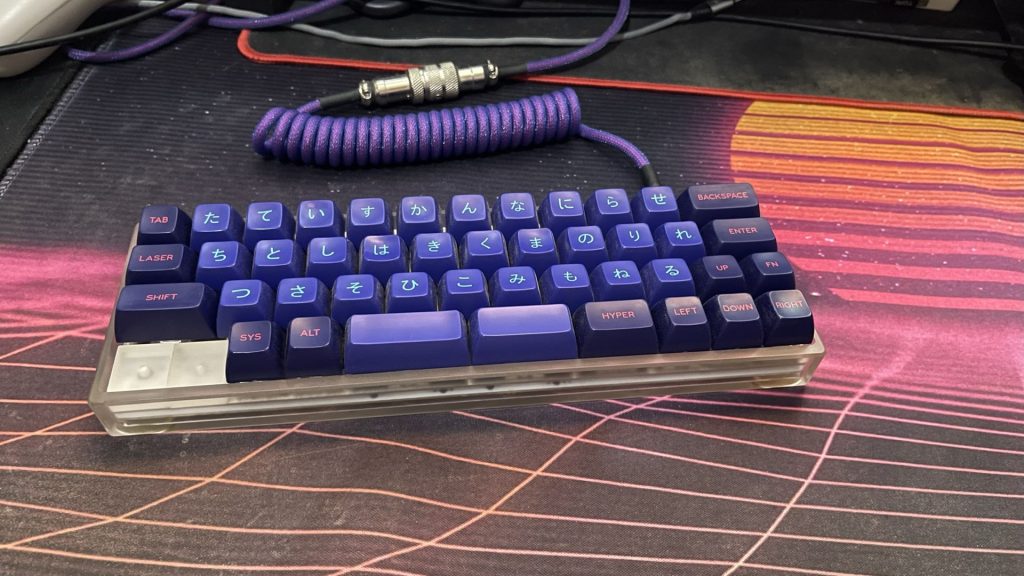
Where are your numbers? I could never use such a thing!

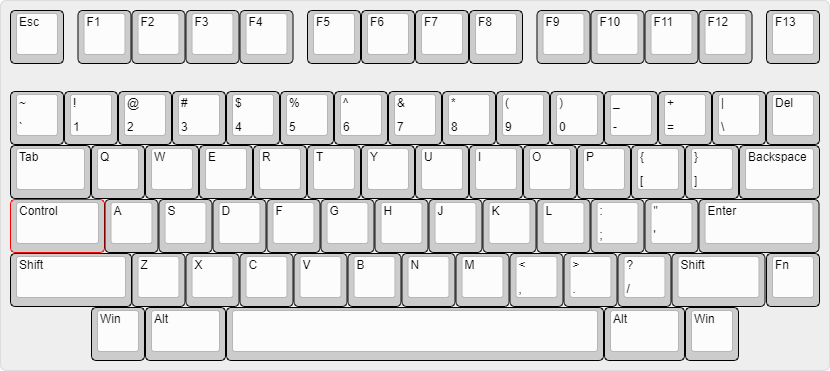
How do you remember where your capital letters are? It’s really the same thing. But instead of pressing shift, you use a different button. If you think of it that way, you’re halfway there to using a 40%.

In fact, most people have already been using 40% keyboards for a while – think of the keyboard on your smartphone. Almost all the symbols are hidden behind a layer key. It’s the same thing here, with the only difference being you’re typing on a much smaller keyboard.

Equinox

Is there any other point of 40% other than portability? Why do you inconvenience yourself by using such a small keyboard?

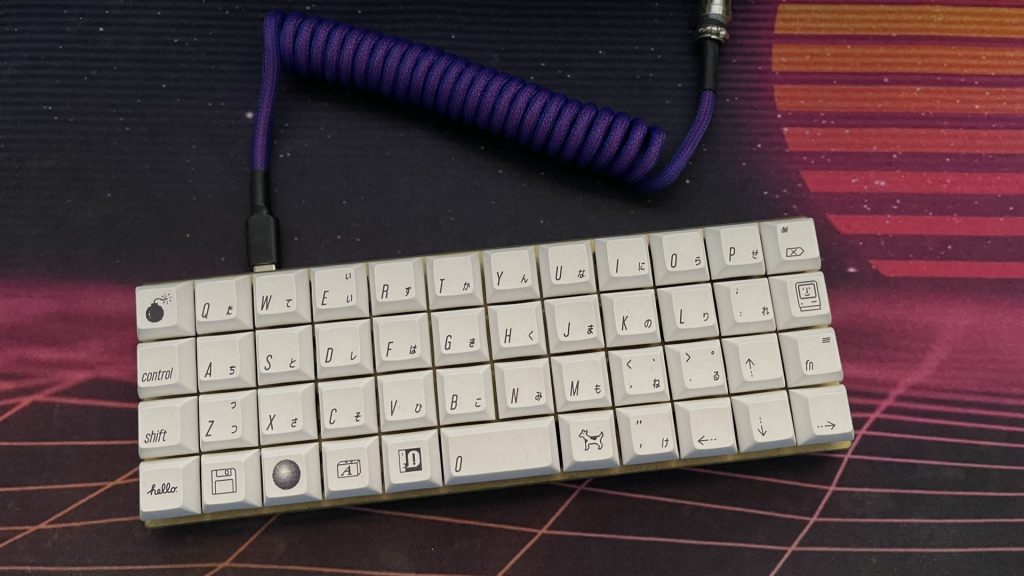
The main reason I got myself a small keyboard was to make travelling with one easier. I used to lug around my full-sized to work before I got into smaller form factors. Bringing such a large device around was a hassle, especially when working out of cafes that had tiny desks. I knew I needed something smaller.

Small keyboards give you the joy of typing on mechanical switches without taking up too much space (on your table or in your bag). That’s my main reason for using a 40%. After getting used to the layout, it turned out to be a blessing in disguise. It no longer became an inconvenience.

Being able to hit every key I needed without stretching was a game-changer for me. I enjoyed it so much that my 75% at home has a 40% layout mapped out to its keys. I only use the redundant keys when typing with one hand.

Kumo

Should I use a 40% keyboard?

I don’t think everyone needs to use a 40% keyboard but if the opportunity presents itself, I’d recommend trying it out. There’s no harm if you discover it’s not for you. But if you do give it a shot, don’t give up after a day or two. It’s not something you ‘get’ right away and will require some effort. Use it daily for a few weeks before you make up your mind.

If you’re content with what you have and don’t need to downsize your keyboard because you don’t travel much/work away from your desk or you’re happy with your laptop’s keyboard, there’s no reason to try a new form factor unless you’re feeling curious or adventurous. Or you like its aesthetics.

Planck

Do people just instinctively know where to press for what keys and layers etc, after a while of using them? Or is there an easier way to remember for beginners? Like a layout chart or something?

For me, it wasn’t instinctive. I had to learn the hard way. Fortunately, my first 40% keyboard, the Vortex Core had side printed keycaps that helped with the transition. For the first few days, I kept looking at the keyboard to make sure I was hitting the right keys. However, that didn’t last long. Once I started remapping the default layout, the keycaps didn’t match them anymore, so I had to rely on my memory. I also saved images of my layout on my desktop.

I used a Vortex Core in the beginning which eased the transition – but couldn’t rely on the keycaps after a while when I started mapping my own layout. Completely ditched them in the end but I did rely on screenshots/images of the layout I saved on my desktop. I used the same technique for some of the keyboards I got after the Core, but after a few months, I didn’t need them anymore (all my 40% keyboards have very similar keymaps).

Prime E

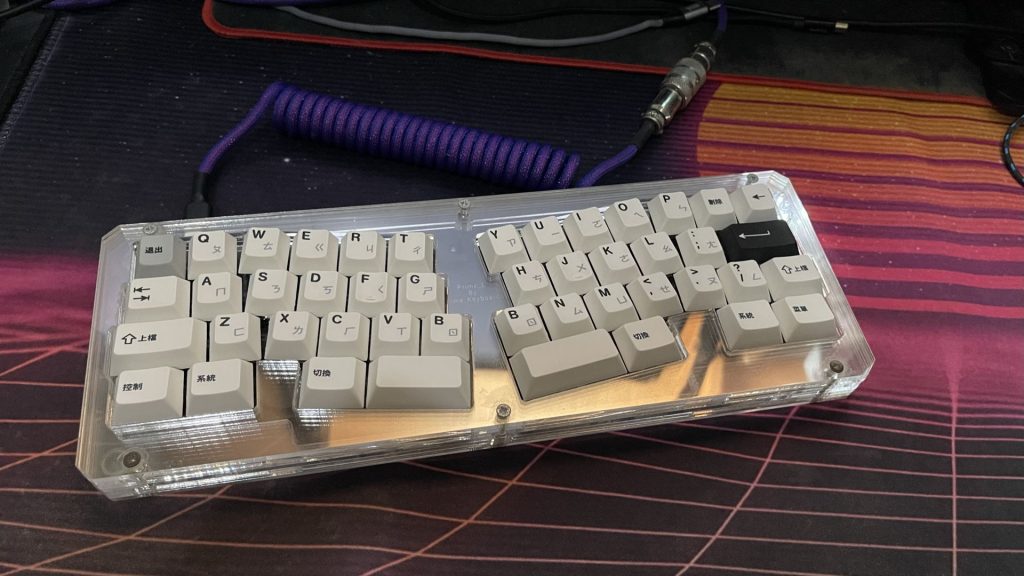
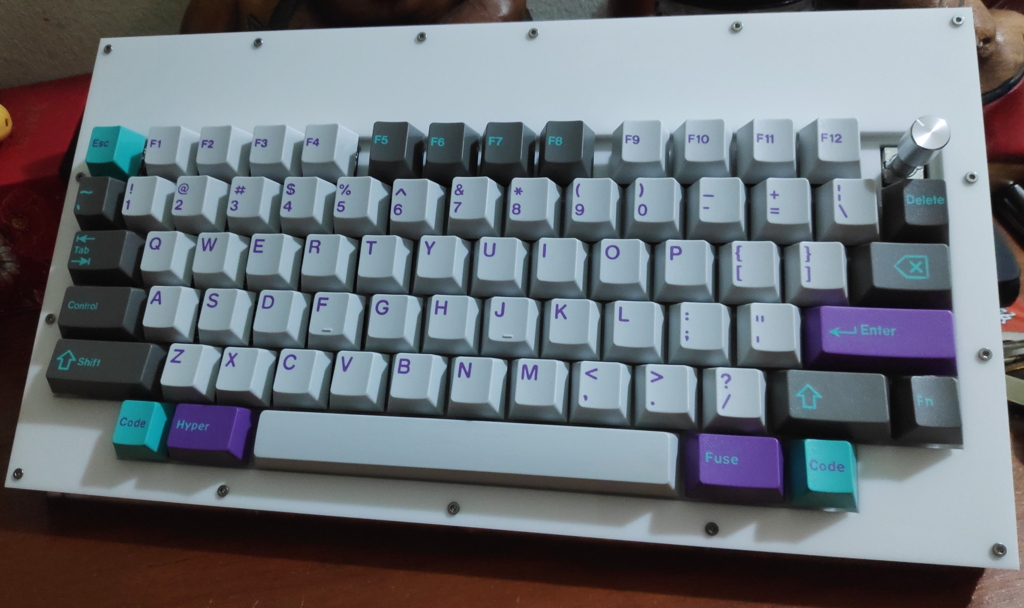
What are the 2 space bars for?

I use left for space and right for activating a layer. When first moving to 40% keyboards, I paid attention to which thumb I used for the space bar and learnt that I always hit with the left one. This was an easy decision for me to make.

Having a function key for the right bar is something I picked up from using the Core. Since it felt natural to use, I haven’t bothered changing it. I know some people bind it to backspace or enter, and that’s the magic of QMK (or programmable keyboards), you can make it whatever you want it to be.

Ristretto

This wraps up the first part of my 40% FAQ. I’ve got more posts lined up on the topic – questions from a hobbyist perspective and an explanation of my 40% keymap, stay tuned!

GNGKB75: A Custom Keyboard

The Design

Earlier this year, I spoke on The Board podcast about plans creating a custom keyboard of my own. I had no idea that it was going to be a project that I’d finish before the year ended.

I was thinking about what kind of layout I wanted for my custom keyboard, I decided I needed something to replace my daily driver (a KBD 19X). I would have used one of my many HHKB layout keyboards at home, but they were missing the dedicated F-row which I needed for gaming. That became my starting point for the keyboard – an HHKB layout with an F-row.

For those of you wondering why didn’t I just buy the EVE Meteor, when it was on sale I was still new to the hobby and wasn’t sure about dropping that much money on a custom keyboard (let alone one that I had to solder). The GNGKB75 was inspired by its design, along with the Plum 75. The TX-75 would have been my next choice if I didn’t commit to this project.

The PCB

I drew up what it would look like in Keyboard Layout Editor and pitched it to Don, who gladly took the design and started working on the PCB. During the process, contrary to what he initially assumed, we both learned that I knew nothing about making keyboards. It was an entertaining back and forth process (thanks for being so patient with me) which didn’t take very long.

For the layout, it wasn’t anything special – just a regular HHKB layout with a row for the function keys. In my original layout, I had left some space in between the number row and the F-row – Don missed it out (it was only discovered after the PCBs had been sent for manufacturing), but it wasn’t that big of a deal to me – at least the gaps separating the blocks of F keys were still present, which was more important to me. The gaps beside F clusters allowed me to hit the keys on the sides without looking at the keyboard (important for gaming).

There was the question of what to do with the additional key on the top row – Don suggested a rotary encoder, which I was immediately on board with. I thought it gave the keyboard a nice touch, was in a nice position, and I enjoyed using the one I had on my Planck. It also gave him the chance to experiment with using encoder footprints on the PCB.

The Case

For the case of the keyboard, I had wanted it to look like a Model F – however, after learning how much it would cost to create such a case, I scrapped those plans and decided on an acrylic sandwich instead. Again, Don whipped up the files for the plates in no time. I got them cut at a local shop (thanks Evolve3D!)

However, I learned that the plate for the keyboard wasn’t perfect when trying to put it together. There was something wrong with the size of the holes for the switches – when one side had the switches put in, the other side would be crooked, and when I straightened the crooked side first, the other side would become crooked instead. To solve this, I used a filing tool to expand the affected holes by about 1mm, and all was fine.

Unfortunately for me, I only noticed this issue after I had soldered the switches in (I have nobody to blame but myself) so I had to spend time desoldering the switches first – which lead me to lift one of the pads on the PCB. This meant I had to jump the switch using a wire – a new experience for me.

The Flaws

One of the problems building my prototype was the switches I used for the keyboard – Everglided Oreos (from Drop). The switch for the space bar was having trouble returning after I put the keycap it on. Initially, I thought that I had installed the stabilizers wrongly, but after checking them thoroughly, it wasn’t the case. I thought, maybe it was a problem with the plate – I filed the stab and switch holes down to no avail. I thought, maybe I had too much lube on the stab, so I wiped it off – no difference. I tried using the switch and stabs with no plate – again, it didn’t help. I went through about five different switches, still no improvement. In the end, I replaced it with a T1 switch, and everything was well again. Based on the solution, it certainly seems like a fault of the Oreo switch, but I’m not convinced – the switch spring isn’t even that light. Anyway, the space bar returns normally now, so I don’t have to worry about it.

The hardest part about building the keyboard? The long wait for all the parts to arrive (diodes, standoffs, screws, etc) so I could build it. It was then about a day of troubleshooting, including desoldering switches, filing the plate, and jumping a lifted pad.

Acrylic sheets not being exactly 3mm meant that my standoffs were slightly too long – I didn’t account for it, which meant I had some gaps in between the top layers of my case.

The corners of the acrylic sheets are way too sharp – something I didn’t take into account during the design stage. The blockers for the F-row cluster gaps are also missing (an oversight).

The Future

This was my first time dipping my toes into the keyboard designing experience, and I had a lot of fun doing it. While my first keyboard isn’t perfect and there’s plenty of room for improvement, I’m happy that it has been completed and I have a functional input device to use. This post was written on it!

If I were to continue to improve this keyboard (which I’ll probably do in the future since I still have some extra PCBs), I would make the following changes:

  • Include rounded corners so my keyboard doesn’t accidentally cut anybody
  • Figure out what caused the plate to be cut incorrectly so no additional filing needs to be done
  • Include blockers for the F-row clusters
  • Increase the size of the standoffs and screws to M3
  • Produce a metal case if I have the funds for it

Edit 2/1/20 – forgot to include the typing test video I recorded for the keyboard

GNGKB75 (Acrylic case)
– JTK Hyperfuse
– Everglide Oreo switches


If you’re interested in building one of these yourself, I’ve got 4 spare PCBs available – I can sell them at cost ($15) + shipping (depending on your location) – you’ll have to source the onboard components and case yourself. Just drop me a message (on Reddit or comment here) to let me know.

All files for the keyboard are open-source and available on Github.


Once again, thanks to Don for all his help. Without him, this project wouldn’t have even taken off. I would still be at step zero.

Soldering Isn’t as Hard as It Seems – Things I’ve Learned

Over the past two weekends, I took the next step in my mechanical keyboards journey – I started soldering my own keyboards. It was something that I was initially hesitant on picking up because of my lack of experience, but after spending over a year in the hobby I decided that it was the correct thing to do.

While this post isn’t going to be useful for anyone who’s already experienced in soldering, I thought I’d share some pointers I picked up firsthand and hopefully help some beginners out there.

Building a keyboard isn’t difficult, and soldering switches is probably the easiest part of building a keyboard. The fact that I, a 33-year old man with no experience or DIY skills, could follow instructions to put a kit together is a testament to how easy it is.

The most beginner-friendly way to begin is to pick up something like a simple numpad kit that has all the onboard components already soldered in. This way, you can get a taste of what it’s like to put a keyboard together by just soldering the switches in, which was what I did.

I picked up this numpad kit from AliExpress and managed to build it in under half an hour. It was that straightforward.

This technique mentioned in the Soldering is Easy comic is correct. You place the component between the iron and the solder – this way, you’ll ensure that the solder will stick to the component because it will only melt the solder if the component is hard enough. This site has some pictures of what a good solder joint should look like.

I might be wrong on the theory here, but what I’ve discovered is that solder will only stick to parts if they are hot enough (or coated with flux?). This is something I did not know at the start. If solder isn’t sticking to your iron instead of your components or the PCB, that means it hasn’t been heated long enough. I know that flux is involved here as well, but I haven’t figured out how that works yet. I know that if solder isn’t sticking to a joint, I continue heating it until it does.

Initially, I did not know why my solder wasn’t melting despite me holding the iron against the component for quite a long time. This resulted in me sticking the solder directly onto the iron to melt it to form a connection – which was the wrong move. This could result in cold joints where the solder is only formed around the joint and PCB, but not creating a connection.

It might seem obvious, but use as much of the soldering iron tip as possible to heat your components. When I first started soldering, I was wondering why sometimes solder would melt instantly vs other times when they wouldn’t melt at all. It was by accident I realized the whole tip of the soldering iron could be used to transfer heat to the components. That was a game-changer for me. Once I learned this, the task became so much easier to do.

Speaking of tips, I found it easier to work with a cone-shaped tip than the fat square tip that came with my soldering iron (TS80). Even though the fat tip was much faster when it came to heating up components, it felt so unwieldy in my inexperienced hands. From what I’ve heard, it can be the better choice in some cases, but I guess I’ll find out in the future. Having a small and precise head to work with turned out to be the right choice for me. If you’re struggling with a square tip, maybe changing to a smaller cone might make the difference.

Fortunately, the fine folks over at The Board Podcast Slack gave me loads of good advice before I started soldering, and one of the best tips was to pick up a solder sucker. I’m very glad I listened because if I didn’t have one with me, I doubt I would have managed to finish any of my keyboard kits. These things are invaluable. Because unless you’re perfect and know how to use the right amount of solder each time, and never make bad joints, they will come useful in the future when you’re desoldering switches. I think there are much more advanced tools you can use for the job, but this SS-02 Solder Sucker has served me well so far. I’m pretty sure I’ll get a lot of use out of it in the future.

As for maintaining your solder sucker, it’s not too difficult – make sure it isn’t clogged up with solder – use some tweezers to get rid of solder stuck in the head every few uses.

Another good tip I’ve picked up is to reflow your joints after you’ve finished them. It might be troublesome, but sometimes it’s better to be safe than sorry. Sometimes joints may look good or functional even if they’re not. After you’re done soldering, it’s a good idea to use your iron to reheat the components and the solder again to reform a connection. If you don’t have a multimeter to test your connections, reflowing solder can help reduce the number of bad connections on your board.

Other tools that I’ve found useful: flush cutters (for trimming stab legs, pro mico headers and switch-legs for shorter cases), tweezers (to hold small components like SMD LEDs or wires in place, and to bridge connections if you ever need to test something), and a screwdriver set with multiple head types (you never know what kind of screws you’ll be getting with your keyboard). A multimeter is also a useful tool for you to test if you have any faulty components, or to test if a switch has been soldered in properly – very useful when you’re building a keyboard that can’t be powered on without a controller.

Lastly, I’d recommend a good place to work while you put your keyboard together. Besides having adequate ventilation and bright lights, you want a table that’s high enough so you don’t get neck strain (like I did) while spending hours soldering components to a PCB. Clamps with adjustable hands would also help for certain components (I’m definitely going to pick up one of these in the future) because trust me when I say it’s no fun trying to solder wires to headers without one of these. It feels like you need three hands just to do the job.

On a side note, desoldering a pro micro has got to be one of the most challenging things to do. I haven’t been able to do it properly yet, but it’s one of the skills I’ll need to pick up in the future. I’ll update this post when I get that down!

Some answers to questions I’ve seen floating around the internet:

What kind of solder do you use?

Cheap solder

I use some cheap solder (photo above) available at my local Ace Hardware which is 60/40. It probably isn’t as good as some other well-known brands but it works for me. I’m no expert but I think most leaded solder with rosin core will do (you need rosin core so it can work for electronics).

What temperatures do you work with?

I initially started at 300° Celsius, but I found that the solder I used melted way faster at 350° Celsius, so I’ve been working at that temperature. It really depends on what you have, so experiment to find out what works for you. If you’re fast and more experienced, you can go even higher to reduce the wait time for your components to heat up. Also, don’t be too afraid of damaging your PCB/components. Unless you’re heating at a super high temperature (something I wouldn’t recommend if you’re new), you shouldn’t be too worried about causing any damage, especially if you’re only doing through-hole components.

Basically, that’s all I have to say on the topic for now. If you have any questions or suggestions, feel free to drop a comment below. I’d be more than happy to hear tips from those with more experience than me.


This post was written on my Fourier and Tanuki – the two keyboards I put together over the past two weekends.