
The Design
Earlier this year, I spoke on The Board podcast about plans creating a custom keyboard of my own. I had no idea that it was going to be a project that I’d finish before the year ended.
I was thinking about what kind of layout I wanted for my custom keyboard, I decided I needed something to replace my daily driver (a KBD 19X). I would have used one of my many HHKB layout keyboards at home, but they were missing the dedicated F-row which I needed for gaming. That became my starting point for the keyboard – an HHKB layout with an F-row.
For those of you wondering why didn’t I just buy the EVE Meteor, when it was on sale I was still new to the hobby and wasn’t sure about dropping that much money on a custom keyboard (let alone one that I had to solder). The GNGKB75 was inspired by its design, along with the Plum 75. The TX-75 would have been my next choice if I didn’t commit to this project.
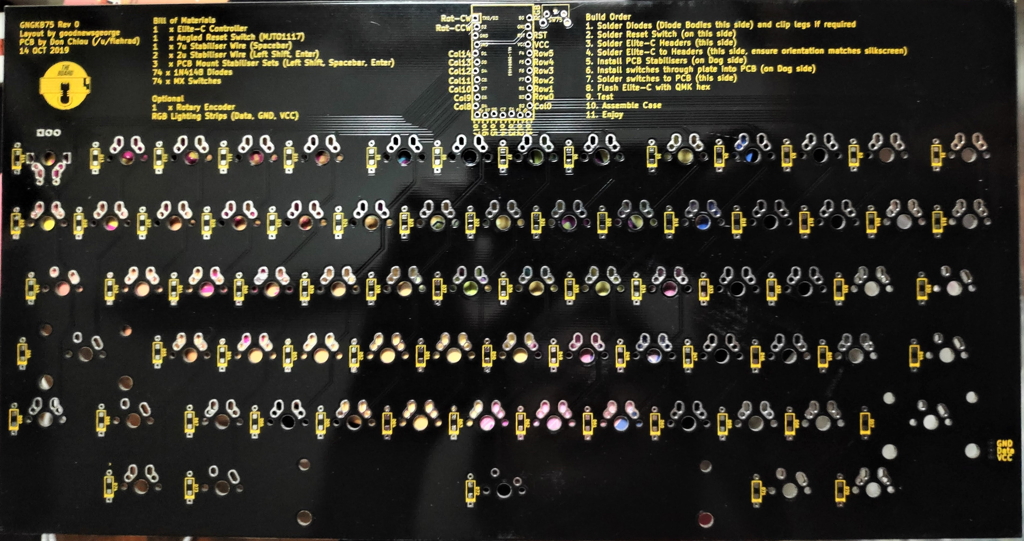
The PCB
I drew up what it would look like in Keyboard Layout Editor and pitched it to Don, who gladly took the design and started working on the PCB. During the process, contrary to what he initially assumed, we both learned that I knew nothing about making keyboards. It was an entertaining back and forth process (thanks for being so patient with me) which didn’t take very long.
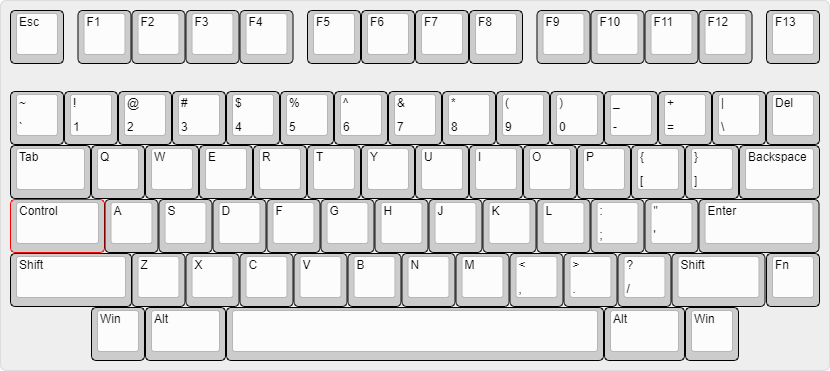
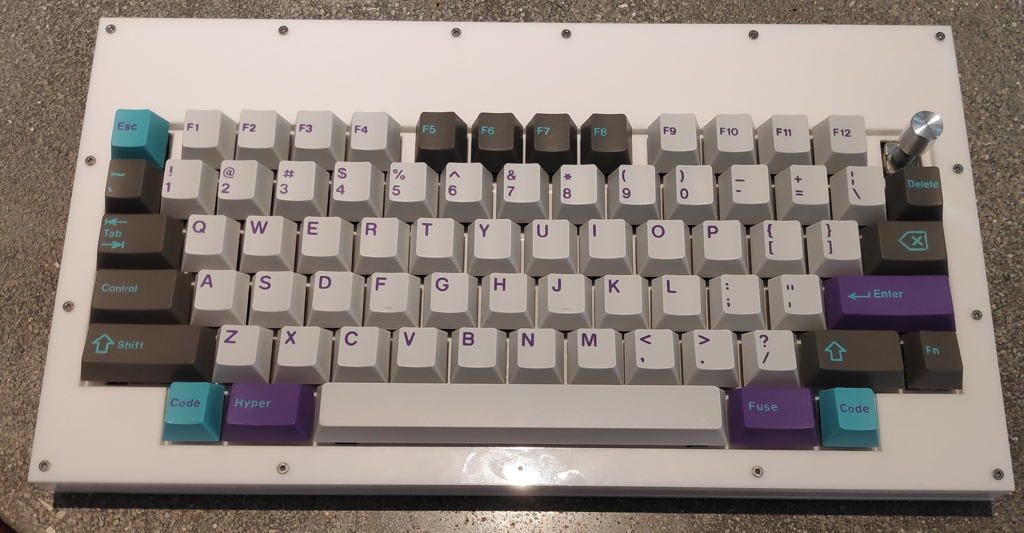
For the layout, it wasn’t anything special – just a regular HHKB layout with a row for the function keys. In my original layout, I had left some space in between the number row and the F-row – Don missed it out (it was only discovered after the PCBs had been sent for manufacturing), but it wasn’t that big of a deal to me – at least the gaps separating the blocks of F keys were still present, which was more important to me. The gaps beside F clusters allowed me to hit the keys on the sides without looking at the keyboard (important for gaming).
There was the question of what to do with the additional key on the top row – Don suggested a rotary encoder, which I was immediately on board with. I thought it gave the keyboard a nice touch, was in a nice position, and I enjoyed using the one I had on my Planck. It also gave him the chance to experiment with using encoder footprints on the PCB.
The Case
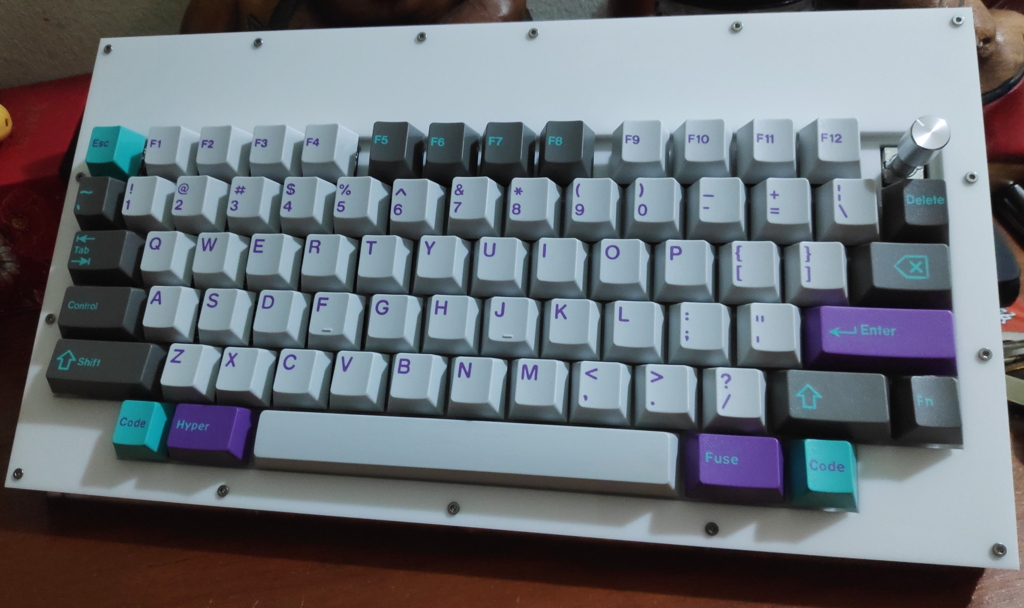
For the case of the keyboard, I had wanted it to look like a Model F – however, after learning how much it would cost to create such a case, I scrapped those plans and decided on an acrylic sandwich instead. Again, Don whipped up the files for the plates in no time. I got them cut at a local shop (thanks Evolve3D!)
However, I learned that the plate for the keyboard wasn’t perfect when trying to put it together. There was something wrong with the size of the holes for the switches – when one side had the switches put in, the other side would be crooked, and when I straightened the crooked side first, the other side would become crooked instead. To solve this, I used a filing tool to expand the affected holes by about 1mm, and all was fine.
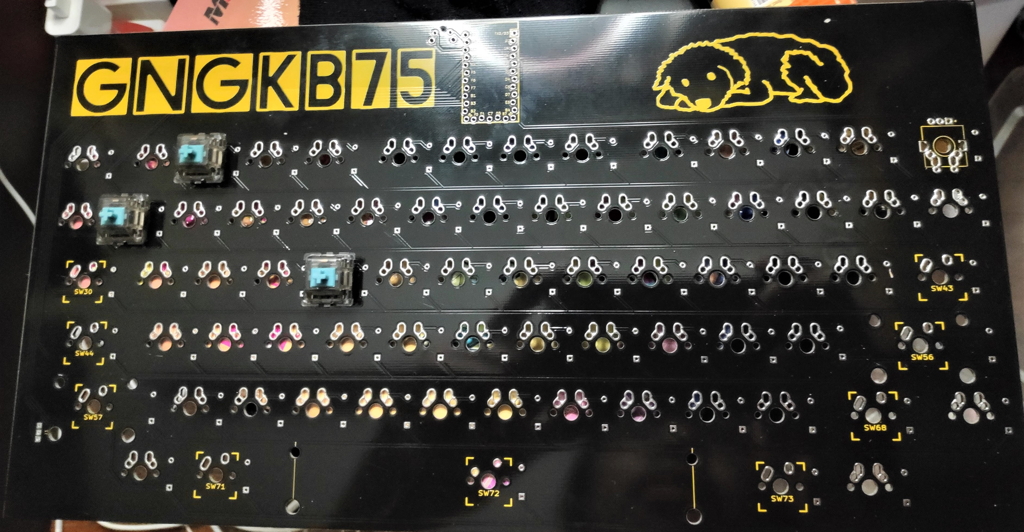
Unfortunately for me, I only noticed this issue after I had soldered the switches in (I have nobody to blame but myself) so I had to spend time desoldering the switches first – which lead me to lift one of the pads on the PCB. This meant I had to jump the switch using a wire – a new experience for me.
The Flaws
One of the problems building my prototype was the switches I used for the keyboard – Everglided Oreos (from Drop). The switch for the space bar was having trouble returning after I put the keycap it on. Initially, I thought that I had installed the stabilizers wrongly, but after checking them thoroughly, it wasn’t the case. I thought, maybe it was a problem with the plate – I filed the stab and switch holes down to no avail. I thought, maybe I had too much lube on the stab, so I wiped it off – no difference. I tried using the switch and stabs with no plate – again, it didn’t help. I went through about five different switches, still no improvement. In the end, I replaced it with a T1 switch, and everything was well again. Based on the solution, it certainly seems like a fault of the Oreo switch, but I’m not convinced – the switch spring isn’t even that light. Anyway, the space bar returns normally now, so I don’t have to worry about it.
The hardest part about building the keyboard? The long wait for all the parts to arrive (diodes, standoffs, screws, etc) so I could build it. It was then about a day of troubleshooting, including desoldering switches, filing the plate, and jumping a lifted pad.
Acrylic sheets not being exactly 3mm meant that my standoffs were slightly too long – I didn’t account for it, which meant I had some gaps in between the top layers of my case.
The corners of the acrylic sheets are way too sharp – something I didn’t take into account during the design stage. The blockers for the F-row cluster gaps are also missing (an oversight).
The Future
This was my first time dipping my toes into the keyboard designing experience, and I had a lot of fun doing it. While my first keyboard isn’t perfect and there’s plenty of room for improvement, I’m happy that it has been completed and I have a functional input device to use. This post was written on it!
If I were to continue to improve this keyboard (which I’ll probably do in the future since I still have some extra PCBs), I would make the following changes:
- Include rounded corners so my keyboard doesn’t accidentally cut anybody
- Figure out what caused the plate to be cut incorrectly so no additional filing needs to be done
- Include blockers for the F-row clusters
- Increase the size of the standoffs and screws to M3
- Produce a metal case if I have the funds for it
Edit 2/1/20 – forgot to include the typing test video I recorded for the keyboard
GNGKB75 (Acrylic case)
– JTK Hyperfuse
– Everglide Oreo switches
If you’re interested in building one of these yourself, I’ve got 4 spare PCBs available – I can sell them at cost ($15) + shipping (depending on your location) – you’ll have to source the onboard components and case yourself. Just drop me a message (on Reddit or comment here) to let me know.
All files for the keyboard are open-source and available on Github.
Once again, thanks to Don for all his help. Without him, this project wouldn’t have even taken off. I would still be at step zero.
Leave a Reply to Liturk Cancel reply